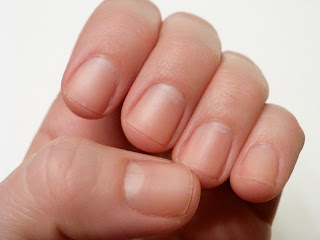
My posts here at Bargain Bound are usually crafty, DIY projects. But not this time! This time I am mixing it up a bit, however it still fits into the bargain category. At-home manicures and pedicures save a lot of money.
I have received compliments on my nails many times. I have been asked about the process I use for my at-home manicures, and most recently I was asked to do a post about that process....and now, I am going to let you in on my secrets.
Over the years I have mastered the art of polishing my nails...and by the way, I say "polishing" because one time, many years ago, a friend told me you "paint" walls and "polish" nails.
My manicures last for many days and they'd probably last even longer if I weren't so "Type A" about little chips. You see, once a couple of nails have chips, I re-polish them. I also admit to being somewhat addicted to nail polish...for some it's shoes, for me it's polish. I am a fan of OPI and follow the release of their lines as some people do clothes designers.
Let's get to it!
Here is a picture of most of my nail polishes. The rack hangs in my closet, however it's full and I need another. When I ordered the rack (which holds 60 bottles) I thought, without counting, that for sure that would be enough room. Nope, no such luck.
The products I use for each manicure include a nail file or two, a nail buffer, OPI Chip Skip, an OPI nail polish, and Seche Vite Fast Dry Top Coat.
The steps I use are as follows:
*Warning* You may read this and think, "What, she applies 4 coats of polish? I don't have time for that." But, don't knock it until you try it.
2. Push back your cuticles. Don't cut. I know when you go to the salons they use their clippers to take off all kinds of skin, but I find that gently pushing them back is just fine.
3. File nails. I choose a square shape with slightly rounded corners. Know that the shorter your nails are, the less likely the polish is to chip. It is important to make sure that all edges are smooth, which is why I usually use the crystal file (see above picture), which takes away any roughness.
4. Use the rectangular buffer to roughen up the nail bed because the polish adheres better. But make sure you use the finer grit because you don't want to leave scratch marks on your nails. Again, check for any rough edges and smooth them out, if necessary.
5. NO BASE COAT. I have found that polish adheres better to my raw nail, than to a base coat.
6. Apply your first coat. I generally apply the first stroke in the middle, then the right, and then the left. Lastly, I touch up any part that needs it. Try not to touch the brush to your cuticle because it starts to look messy. Also, the more brush strokes you use, the goopier and thicker the polish gets...not good.
7. After carefully applying the first coat, go right on ahead and apply the second coat.
8. I usually apply a third coat, however, if you apply the first two coats heavily, you'd probably be fine with that. You will need to give some wait time between coats (10 minutes or so), so find a good TV show to watch.
9. Finally, the last, and most important, the Top Coat. If you don't own Seche Vite Fast Dry Top Coat you must go out immediately and pick up a bottle. It's the only non-OPI product I use. The polish is sold wherever salon polishes are sold. It is an amazing product that performs. Even though you might already have 2-3 coats of polish on, one thick coat of this stuff will set your polish in minutes.
10. There you go....done!
11. If you really want your manicure to last, then go ahead and add one more coat of the Seche Vite two to three days after you do your manicure.
I used the color, "Wocka Wocka" from the Muppets collection this evening.


I keep my nails very short because they do not grow correctly. I just never thought about polish since they are so short. Now that I have all the info I must take better care of them. Thank you so much for sharing!!
ReplyDeleteWow, that is amazing! I just did a Sula Paint and Peel manicure in a Tiffany blue. The good part was that it was a fun color and I took inordinate pleasure in peeling it off two days later; the bad news was that it peels off:)
ReplyDeleteI am marking this post... once the kids are out of diapers, I want my nails to look pretty again! Thanks for sharing!
ReplyDeleteOh Jenny, I laughed when I read your comment. It will be heaven when your kids are out of diapers...but don't wait all those years. You deserve for your nails to be polished every now and again. Enjoy!
DeleteWhere did you get your nail polish rack? Or did you DIY? I love your blog, I think I have looked at everything you've blogged about on here. Very nice!
ReplyDeleteHi Brook....so glad you stumbled across my bog and have had fun looking at my entries. I got this polish rack from the following website:
ReplyDeletehttp://www.idonails.com/shop/product_info.php?products_id=4380&fb_source=message.
The rack wasn't too expensive, but the shipping was. However, it is totally worth it and I have bought a second one since this post.
thanks Emily!
DeleteThanks Emily!!! Feeling inspired!
Delete