Friday, October 7, 2011

Halloween Mantel

It seems like I just got my fall mantel up and now it's time to switch over to Halloween.  I considered not changing it out, but my son asked me the other day, "Mom, are you going to put out Halloween decorations?"  It made me smile.  I hope having the house adorned with seasonal decorations is something he remembers because I enjoy doing it.

So without further ado...here it is.


Thursday, October 6, 2011

Thursday Thoughts

Ten Thoughts This Thursday

1.  I wish...school lunches would make themselves.

2.  I want...a new creme MAC blush.

3.  I think...my body would really appreciate a full-body massage.

4.  I watch...America's Next Top Model.

5.  I appreciate...a good parking place.

6.  I enjoy...the smell of the air after a good rain.

7.  I struggle...with not having sweets (I'm doing the Crossfit 50 day challenge)

8.  I feel...tired.

9.  I recommend..."Pass At Me" for a getcha-goin' song.

10.  I hope...my daughter is more motivated by her new gymnastics class/teacher

Tuesday, October 4, 2011

Halloween Candelabra

Do you remember this candelabra that was part of a set from this project?  Well, I hung onto it because I had the perfect idea of how to use it.


My idea was to spray paint it black and put orange pillar candles in it for Halloween.  The other day I put my idea into action.  I started with Rustoleum's Black Glossy paint and oh my...I am in love.  The paint has such a smooth and shiny surface!  After seeing it painted, I was looking for other things I could spray.

Here is how it turned out.


Of course I wanted to cover the whole wall with the netting, but to be fire safe, I only hung it below.

Sunday, October 2, 2011

I've Been Featured!

Lil' old me has been featured on Lines Across My Face.  She chose to feature my felt wreath--check out her blog to see my project over there.  I am so excited...my very first feature!!

Friday, September 30, 2011

Dresser Paint Job

I am thrilled to be sharing this post with you!  This project was on my list of things to do this summer, but I never got around to completing it.  Recently, I stumbled across this post from Centsational Girl about painting furniture.  She had some great tips, some of which I used on this project.

So here's the story:  My son has a dresser in his room that my husband and I purchased right out of college after we had gotten married.  Money was tight so we decided on purchasing some unfinished furniture.  I painted the dresser green and purple to match our (then) comforter.  Not sure what I was thinking, but obviously I thought it was "the bomb."  Once we were done with it and my son inherited it, I painted an orange color right over the green and purple (without any sanding and priming.)  I had also dry brushed an off-white on top of the orange.  Over the years the paint has chipped, especially on the top of the dresser.  It had become an eye sore and something needed to be done.

I came across this picture while poking around the internet and instantly became inspired.

So, here is what I started with:


This is where it gets bad.  The top of the dresser had chipped paint and "guck" that was left after my son tried growing crystals with a kit.


The gradient paint job was a great idea until I realized that the dresser had 5 sets of drawers instead of four like in the picture.  The problem was that all of the paint chips had 4 colors on the cards and I needed six (5 colors for the drawers and 1 color for the dresser.)  Sure, I could've extended the colors onto the next paint chip, but the colors either got too light, or I didn't like them.  Here is the paint chip from Behr I decided on:


After looking at a lot of colors and trying to figure how I was going to make this work, I decided that I would paint the frame of the dresser the darkest brown.  I would also paint the top set and the bottom set of drawers the darkest brown.  The middle drawers would be painted the 3 other colors.

To save money, I purchased the sample size containers of paint for the middle drawers.  I used Martha Stewart and Glidden because they offer a satin finish and the Behr samples only come in flat.  The woman at Home Depot color matched the paint for us since we had decided on Behr colors...and I think I ended up with one Glidden because she ran out of Martha paint.


Then, because we chose Martha for the drawers, we went with Martha for the dark brown color so that everything would have the same sheen.  Underneath the Martha paint is the primer that Centsational Girl suggested.  It is an oil based primer so I used one of the (pink) rollers for smooth surfaces and just trashed it when I was done.  I wasn't about to try to clean it.


Here are some of the materials I purchased for the project. 

The first thing I did was use a sander to rough up the drawer fronts (even though the primer says said it wasn't necessary) and the dresser top.  I did a more serious sanding job on the top of the dresser compared to the drawers.  I used a roller to paint the entire dresser.


We had this primer tinted one of the lighter browns on the paint chip.  It was easier to cover the tinted color versus the bright white of the original primer color.

After the primer...


And now....(drum roll, please) the finished product!


This project was completed in one afternoon and for only $45.00!!

Thursday, September 29, 2011

Thursday Thoughts

Ten Thoughts This Thursday

1.  I wish...there was no daylight savings...just let it happen naturally.

2.  I want...new hardwood flooring.

3.  I think...I might participate in the "No Bread" Crossfit challenge (http://www.youtube.com/watch?v=3_oIDEaOl6U)

4.  I laugh...at our chickens.

5.  I appreciate...that my kids don't fight me when it's time for homework.

6.  I enjoy...the smell of fall scented candles.

7.  I struggle...with stepping away from the candy corn.

8.  I feel...super duper sore from yesterday's Boot Camp.

9.  I recommend...http://www.food.com/recipe/Crock-Pot-Garlic-Rosemary-Chicken-Breast-186256

10.  I hope...tomorrow's in-service day is better than today's.

Wednesday, September 28, 2011

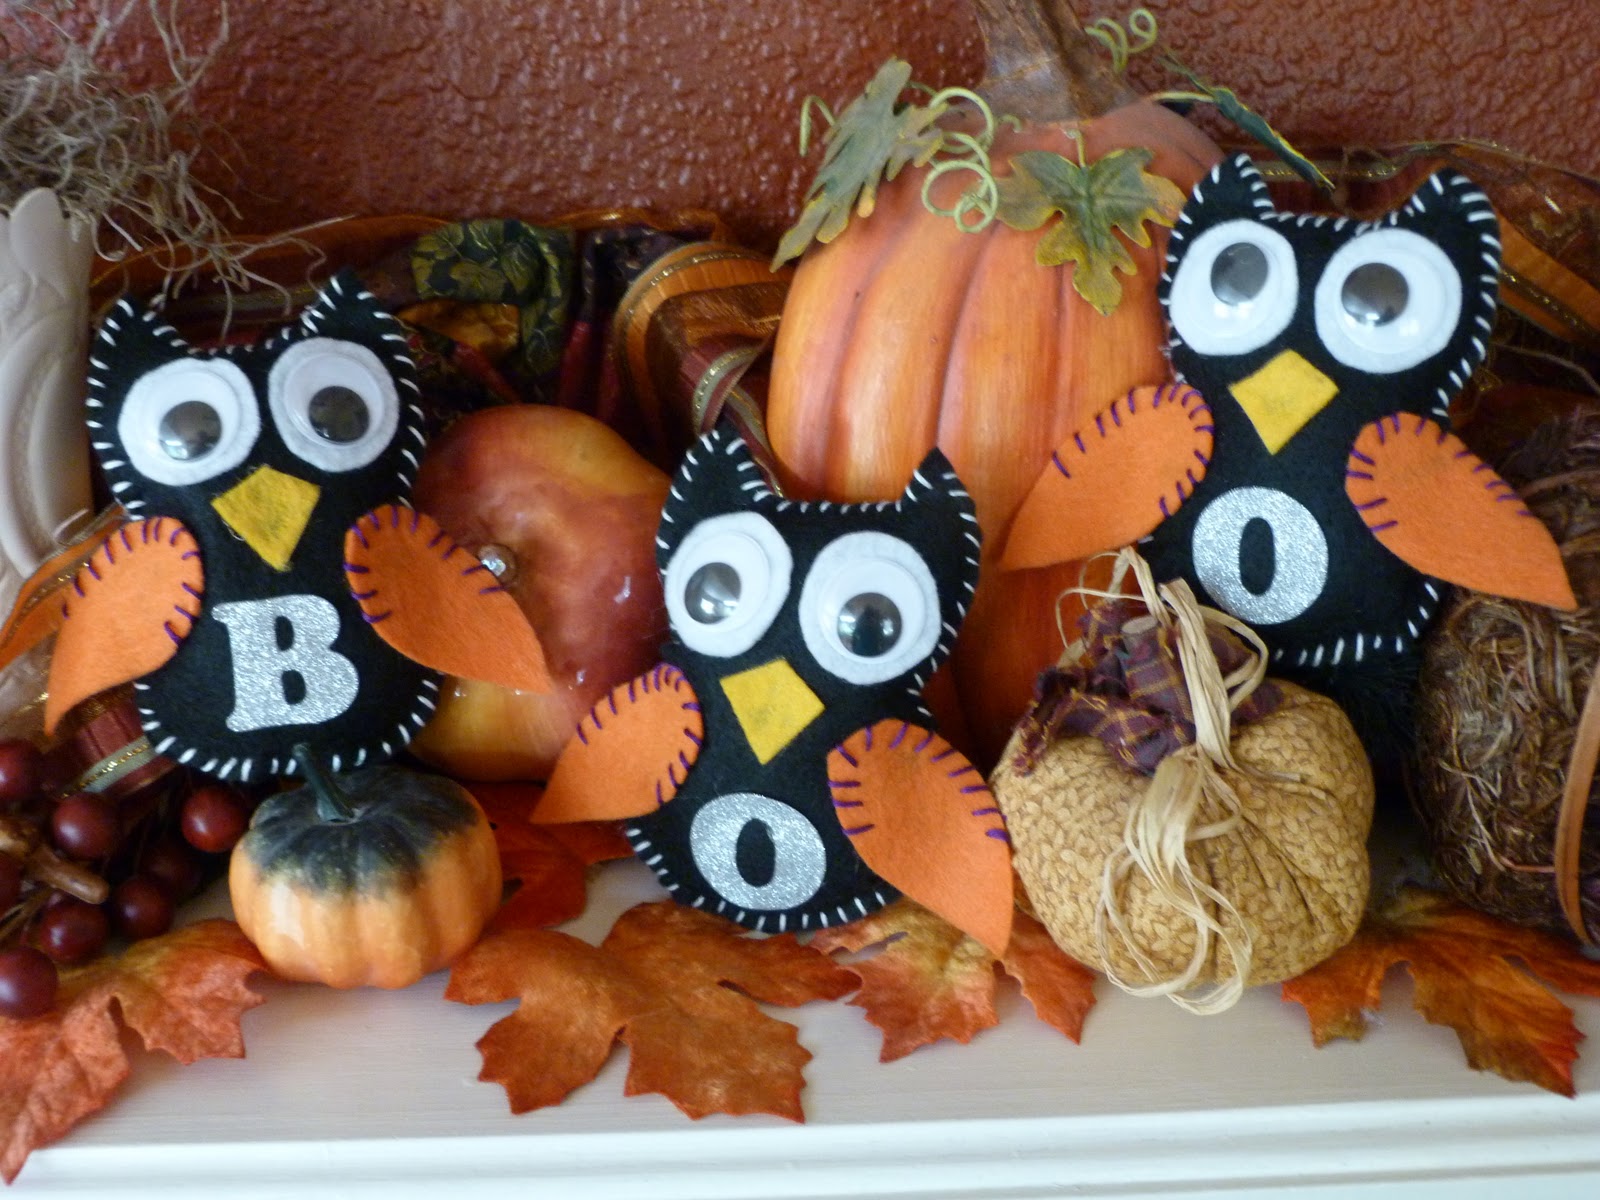
Halloween Owls

I finally finished my first (and maybe only) Halloween craft.  A while back when fooling around with some felt, I made an owl, which can be seen here.  For October, I thought it would be cute to make 3 owls and put lettering on the front to spell "BOO."  And so I did.

I pulled out my patterns and felt.
I decided that I wanted purple thread for the wings and white for the border of the owls.

I used my glue gun to attach all the parts and decided to use "googly" eyes instead of buttons.  Are the white circles behind the eyes perfectly cut?  No.  But, to me, that's part of the charm. 

I found the glitter letters at Joann's.  It came with a complete alphabet set.  I used the glue gun to attach the letters, too.


Finished product!  I placed them on my "Fall Mantel" for this picture, but I look forward to finding a creative way to display them for my Halloween Mantel.

Total Cost = $4.00
I had all of the materials except the lettering.