Monday, November 28, 2011

Revamped Candlesticks

A few months ago during one of my Goodwill shopping visits I came across a couple of bowls and a couple of candlesticks.  I envisioned them glued together to make larger candlesticks.  I had the pieces tucked away thinking I would paint them red and use them on my Valentine's mantel, but I just couldn't take it anymore.  I wanted to fix them up and use them on my Christmas mantel.  So that's exactly what I did.

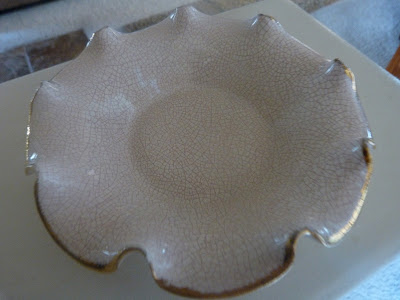
Here is what I started with.  The bowls were 49 cents each and the candlesticks were 99 cents each.


Using some E6000 glue I bonded them together.


So what came next was the big question:  What color was I going to spray paint these beauties?  I really thought about going bright red, (because I could still use them for Valentine's Day) but then I thought I should go a little more neutral so that I could use them even more throughout the year.  As I was perusing the spray paint wall at Home Depot, my eyes were brought up to the top shelf where this paint was sitting:


You can't tell from the picture, but the top of the paint can is pearlized.  Hello, a pearlized spray paint?...It's come so far!  I saw that and I was sold!  Plus, it has a built-in primer so I didn't need to buy a can of that.  The can of paint was about $7.00.

I ended up painting the candlesticks a creme color first because when I started in with the pearl color on the brass, it didn't have a lot of pigment in it...it's almost more of a accent finishing color.  So after a few coats of this and that, they turned out beautifully.  I can't wait to use them year round.


And the mirror...our newest purchase and I am in love with the look of it.  We should have done that a long time ago.  We purchased that at Home Goods for $40.00.

Sunday, November 27, 2011

Felt Rosette Tree

I would like to begin this post by saying that this project took a lot longer than I had anticipated.  My vision was to have three "trees" each of different sizes.  The "trees" would be covered with green felt rosettes.

The materials I used included:  3 foam cones of differing sizes, 3 different colors of felt, glittery stars, and lots of glue by way of a low temp glue gun.


I began with the smallest cone.  I used a small glass to trace circles on the different colored pieces of felt.  Then I cut them all out and turned them into rosettes.  Here is a link to a rosette tutorial:  http://mrspriss.com/2010/03/12/tutorial-felt-rosettes/.


Once the cone was covered I glued a star on top.  Then I started in on the second and third cones.  I spread this work out over a week.  I'm pleased with the finished product and glad that it's over!


I have a hard time getting good light in our family room.  The colors didn't come out as vibrant as they are in person.  For kicks, I took one picture in "Expressive Mode."  It's truer to the colors.


Sunday, November 20, 2011

Poinsettia Wreath

This fall I tried my hand at making a felt flower wreath for our front door.  


I enjoy having it on the door and thought I needed one for Christmas.  Of course, the first place I looked for inspiration was Pinterest and wouldn't you know it, I found a tutorial from PlanetJune for making felt poinsettia flowers. 

I started with my wreath and some yarn.  I chose the same kind of wreath I used before because it's covered in plastic, which makes it easy to manipulate the yarn as it gets covered. 


For the yarn, I chose a creme color that had some texture.


The next thing I did was cut the felt up according to the directions in the tutorial.  Then, using my low-temp glue gun, I tacked my petals together.  I will say that the tutorial uses a needle and thread to attach all of the petals, but I struggled and instead went for what I am comfortable using:  a glue gun.


Once I had 5 red petals glued together I then glued 5 green leaves in between/behind the petals.  Finally, I used some yellow felt to make the center of the flowers.  The tutorial for those can be found here.

After working for a couple of nights I had a nice pile of poinsettias.  I played around with the arrangements of the flowers for a while, and once got them where I wanted them, I used my trusty glue gun to apply them.  I used 7 flowers, because it's best to use an odd number of something that is being grouped together.

After gluing the flowers on, I felt like it needed something to add texture.  While shopping at Hobby Lobby, I came across this garland of pearls.  I wove the pearls around the flowers.  The last touch was a "Merry Christmas" ornament I hung in the middle using some red satin ribbon.

I can't wait to put it up on my door for the holidays!


Friday, November 18, 2011

Busy as Ever!

This is totally me right now, juggling everything!  Between working, my kids' sports, and daily life, it just doesn't seem to stop.  I have one holiday craft that is finished, but just needs to be posted .  I also have two other projects ready to be made--I have the materials, but am lacking the time.  Ugh...I need more time.  Luckily, we are all on vacation for the next week.  I hope to get caught up.  Thanks for stopping by!

Tuesday, November 15, 2011

Mantel Re-do

In our house, there is a wall with a fireplace that can be seen from both our living and family rooms.  On each wall is a mantel.  Years ago I painted the mantel in one room dark brown, in order to cover the 1980's oak that was everywhere.  I've been pleased with the brown mantel, but when I saw this post
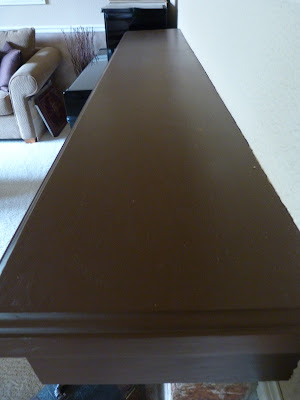
from Centsational Girl's blog it inspired me to try stripping the paint off the mantel in order to sand and stain it. Here is what the mantel looked like before.


I gathered my materials (at Home Depot)


Using a regular paintbrush, I applied the Citristrip and within 20 minutes, this is what the paint looked like.


Within 45 minutes I was strippin' that paint off and it came off beautifully.  It was back to the original oak color.


After the wood had dried I used an orbital sander to get the varnish off.  I found a dark stain (officially called "Dark Walnut) that we had in the cabinet.  Using a disposable sponge "brush" I applied 2 coats, letting the first coat dry overnight and then applying the second coat the following day.


Here is the after color:


I'm happy with the outcome, however seeing the wood grain again is going to take some getting used to.  It was solid brown for so long.


Friday, November 11, 2011

Ragged Wreath

Months ago I had offered up some links to a friend, Cathy.  They were some of my favorite blogs and through one of them, a spark of creativity was born.  From that, Cathy has started her own Etsy shop of coastal style novelties and decor, and has featured a craft on Groopdealz.  As a thank you, she sent me one of her ragged wreaths.  


Her Esty shop address is www.swishingtales.etsy.com.
Cathy offers some cute goodies such as a fall inspired pennant flag garland,


a linen wreath with a starfish accent piece,


and hand painted wooden surfboards.