Tuesday, January 31, 2012

Refinished Table

I started this blog in June of 2011, however I started completing projects (worthy of sharing with others) in January of 2011.  As I've mentioned before, I used to post my before-and-after pictures on Facebook and recently I learned how to take them from my Facebook photo albums and copy them into my iPhoto albums.

Yay!

I am going to take those projects and do a series of posts because it's those projects that got me into starting my blog.

Post #1:  Refinished Coffee Table

We have a coffee table we purchased at Cost Plus years ago.  It's nothing fancy...it wasn't expensive...and it has been perfect to have around the house with two young children.  One day I noticed how beat up it was looking with so many scratches, scratches that couldn't be touched up with a stain.  The reason the stain wouldn't last (or soak into the wood) was because of the glossy finish, so I decided that the only way to make it look better was to sand off the finish.

Here are some before pictures:


The first step was to tape off the rock top so that it didn't get harmed by the electric sander or the stain.  Once it was covered I went to work with my electric sander.


Ahhhh, bare wood.  Oh, the possibilities!  I decided I wanted to keep the finish dark to match our home and other pieces we have nearby.  I used an oil based stain (Polyurethane) and a couple of coats of clear finish (also Polyurethane.)

The finished product:


It's still a "ho-hum" table, but it works.  I was able to try my hand at finishing my first piece of furniture and I'm okay with the outcome.  Will we have it forever? No.  Will it last a few more years with the kids? Yes.  At least the scratches are gone and it looks better.

Wednesday, January 25, 2012

Teacher Valentine

Here is an idea for a Valentine's gift for a teacher.  I made these last year, before I started my blog.  I have a (somewhat) before picture and an after picture--you'll get the idea.

For one of them, I started with the red plate I found at Target.  And...I was just at Target this evening and they have something similar, as well as bowls.  I converted an old candlestick into the pillar.  I first spray painted the candlestick and then using E6000 glue, I adhered it to the bottom of the plate.

The other gift was made of a glass heart-shaped dish I found at Crate and Barrel.  Again, I used an old candlestick as the pillar and spray painted it white and adhered it with E6000 glue.

The cookies were the peanut butter kind that you make during the holidays and put a Hershey Kiss in the middle.  In honor of Valentine's Day I used peanut butter filled Dove chocolates.

I found the tag online and with cellophane, I wrapped the whole thing up.

Super cute.  Super easy.


Sunday, January 22, 2012

Valentine's Day Mantel

It seems a bit early to have my Valentine's mantel up, but since I wanted to post about it I figured I needed to get it put together and finished.

I made a couple of things for this mantel, the first being the 3 pom pom hearts hanging from the mirror, which can be read about in this post.

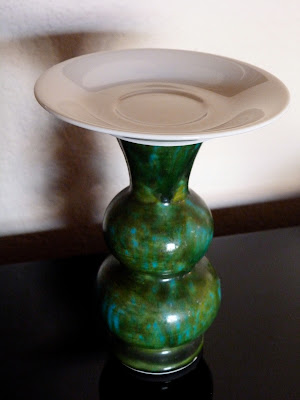
The other thing I whipped up was the pink candle holder.  While strolling through Goodwill, I came across this green vase for 99¢.  I liked the bubble effect.  I also bought the small plate for 49¢.  Using some E6000 glue, I bonded them together.


I ran into a problem though...When I placed a pillar candle on it, the balance was off and the candle tipped over.  Back to Goodwill I went.  I picked up another, larger,  49¢ plate to glue to the bottom of the vase and spray painted it pink.  Much better.  I placed some of the extra crystals from the pom pom hearts on the plate, however I think it would look cuter with some Conversation Hearts (I'll have to pick some of those up soon.)


The pom pom hearts.


The Finished Product

Thursday, January 19, 2012

Thursday Thoughts

Ten Thoughts This Thursday
1.  I wish...I was curled up next to a warm fire while watching it snow.

2.  I want...things to settle down a bit--it's been hectic around here lately.

3.  I think...there were many beautiful gowns at this year's Golden Globes.

4.  I laugh...at some of the positions my cats sleep in.

5.  I appreciate...a scrubbed down clean shower.

6.  I enjoy...listening to live music.

7.  I like...that my son enjoys reading at night (he's lovin' his first Matt Christopher book.)

8.  I feel...excited about getting my Valentine's mantel up this weekend...love red and pink.

9.  I recommend...a super soft brie cheese and fig jam spread on sliced baguette.

10.  I hope...my husband's truck gets repaired in a timely manner (replacing the engine...ugh...)

Wednesday, January 18, 2012

At-home Manicure

My posts here at Bargain Bound are usually crafty, DIY projects.  But not this time!  This time I am mixing it up a bit, however it still fits into the bargain category.  At-home manicures and pedicures save a lot of money.

I have received compliments on my nails many times.  I have been asked about the process I use for my at-home manicures, and most recently I was asked to do a post about that process....and now, I am going to let you in on my secrets.

Over the years I have mastered the art of polishing my nails...and by the way, I say "polishing" because one time, many years ago, a friend told me you "paint" walls and "polish" nails.

My manicures last for many days and they'd probably last even longer if I weren't so "Type A" about little chips.  You see, once a couple of nails have chips, I re-polish them.  I also admit to being somewhat addicted to nail polish...for some it's shoes, for me it's polish.  I am a fan of OPI and follow the release of their lines as some people do clothes designers.

Let's get to it!

Here is a picture of most of my nail polishes.  The rack hangs in my closet, however it's full and I need another.  When I ordered the rack (which holds 60 bottles) I thought, without counting, that for sure that would be enough room.  Nope, no such luck.


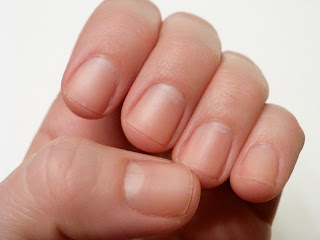
The products I use for each manicure include a nail file or two, a nail buffer, OPI Chip Skip, an OPI nail polish, and Seche Vite Fast Dry Top Coat.


The steps I use are as follows:

*Warning*  You may read this and think, "What, she applies 4 coats of polish?  I don't have time for that."  But, don't knock it until you try it.

1.  Soak hands in warm water or do your manicures after showering.  The soft skin is easier to work with.
2.  Push back your cuticles.  Don't cut.  I know when you go to the salons they use their clippers to take off all kinds of skin, but I find that gently pushing them back is just fine.
3.  File nails.  I choose a square shape with slightly rounded corners.  Know that the shorter your nails are, the less likely the polish is to chip.  It is important to make sure that all edges are smooth, which is why I usually use the crystal file (see above picture), which takes away any roughness.
4.  Use the rectangular buffer to roughen up the nail bed because the polish adheres better.  But make sure you use the finer grit because you don't want to leave scratch marks on your nails.  Again, check for any rough edges and smooth them out, if necessary.


4.  Apply 1-2 coats of the OPI Chip Skip.  This product has the consistency of alcohol.  It dries instantly upon application.  I apply it to the top half of my nails, which is where most of the chipping occurs.
5.  NO BASE COAT.  I have found that polish adheres better to my raw nail, than to a base coat.
6.  Apply your first coat.  I generally apply the first stroke in the middle, then the right, and then the left.  Lastly, I touch up any part that needs it.  Try not to touch the brush to your cuticle because it starts to look messy.  Also, the more brush strokes you use, the goopier and thicker the polish gets...not good.
7.  After carefully applying the first coat, go right on ahead and apply the second coat.
8.  I usually apply a third coat, however, if you apply the first two coats heavily, you'd probably be fine with that.  You will need to give some wait time between coats (10 minutes or so), so find a good TV show to watch.
9.  Finally, the last, and most important, the Top Coat.  If you don't own Seche Vite Fast Dry Top Coat you must go out immediately and pick up a bottle.  It's the only non-OPI product I use.  The polish is sold wherever salon polishes are sold.  It is an amazing product that performs.  Even though you might already have 2-3 coats of polish on, one thick coat of this stuff will set your polish in minutes.
10.  There you go....done!
11.  If you really want your manicure to last, then go ahead and add one more coat of the Seche Vite two to three days after you do your manicure.

I used the color, "Wocka Wocka" from the Muppets collection this evening.


Monday, January 16, 2012

New Layout

Yes, you have clicked on the correct link.  I recently updated the look of my blog.  I have had the previous layout for quite a while and with the New Year, I thought it was time for a New Look.  It's bright and I love it.

And if you're here for the first time...take a look.  It's great to have you here.

Sunday, January 15, 2012

Pom Pom Hearts

I love decorating for Valentine's Day.  

I enjoy having the red and pink colors pop around the house, especially on my mantel.  Now, I haven't decorated my mantel for the occasion quite yet, but this weekend I worked on a craft to hang from the mirror above our mantel.

Right now, my mirror is occupied by this, my newest wreath.


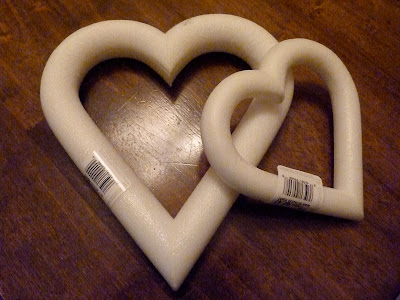
My idea was to somehow cover a styrofoam heart to hang from the mirror.  Hobby Lobby had a heart, however the largest one wasn't big enough, so I decided to do a trio of hearts.  The following picture is missing the largest heart because I got to going on the craft so quickly, I forgot to take a "before" picture.  I think all three hearts totaled about $5.00.


While looking for Valentine's Day ribbon, I stumbled across these jewels and I thought they'd be a nice addition and add just enough sparkle.  Each bag was priced at $1.99.


I'm usually pretty good about taking some "during" pictures, but not this time.  My apologies.   I just didn't have it in me.  But...I can tell you this.  You can follow this link to learn how to make felt pom poms.  My wreaths are just a bunch of pom poms glued together. 

I started by lining the inside of the hearts and worked my way outward until the styrofoam wreath was nearly covered.  I did not cover the entire thing, since it will be resting on the mirror.

After gluing on all of the pom poms, I added the jewels here and there.

Ta, da...done!  I can't wait to hang them from my mirror and I will be posting pictures of my mantel next week
so stay tuned.


Thursday, January 12, 2012

Reworked Key Ornaments

Last week or so I posted about a couple of things I had found at after-Christmas-sales.  One of them was these key ornaments.


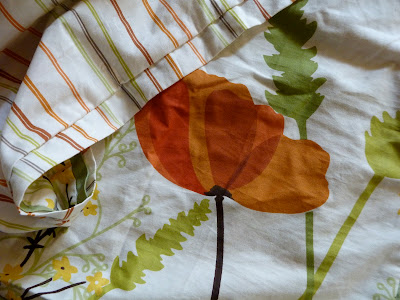
My husband and I are itching to redecorate our bedroom, so I decided this project would be for that room, in particular.  I'm saving my bedroom "before and after" pictures for when it's all finished, but I will give you a sneak peek at our new comforter.


Our old bedspread was brown with some green striping.  I was excited to get something in there that is bright.  I love the accent colors:  orange, green, and yellow.
For this project I knew I was going to need 3 frames.  I was in Goodwill searching around and came across three different frames, but the same size. 


Just a note: On the back of the 3rd frame was this sticker.  Someone bought that for $15.95?  Really?

 My plan was to spray paint the frames dark brown and take the glass off.  The inside of the frames would be three different colored fabrics.  I took my pillowcase (to match colors) to JoAnn's and walked out the door with these fabric pieces.


 I spray painted the frames dark brown and the keys orange.  The orange paint was a "glossy" paint and they came out looking like this:


I cut 3 pieces of cardboard into 5x7 pieces and hot glued the fabric around them.  I cut the fabric 6x8.  After placing the fabric in the frame I placed the key in the middle so I could see what it would look like.

Not too shabby...but a little too "perfect."  I decided to pull out my ol' trick of rubbing some water based stain on them to give them a weathered look.  I brushed the stain on with a small paintbrush and wiped off the excess with a paper towel.  I was pleased with the way they turned out.


I pulled out my trusty glue gun and got to work.  I glued the keys into the middle of each frame and hung them up on the wall. 


And here they are close up.


You've made it to the end of this post and guess what...I have an UPDATE! I lived with the framed keys for a couple of days and I decided the frames were too small.  Hobby Lobby had all of their frames at 50% off, so I thought it was worth the money to get three nicer frames that matched.  It only set me back $20.00 for all three frames.  Here is how they look now.