Monday, July 1, 2013

Spiced up Spice Rack

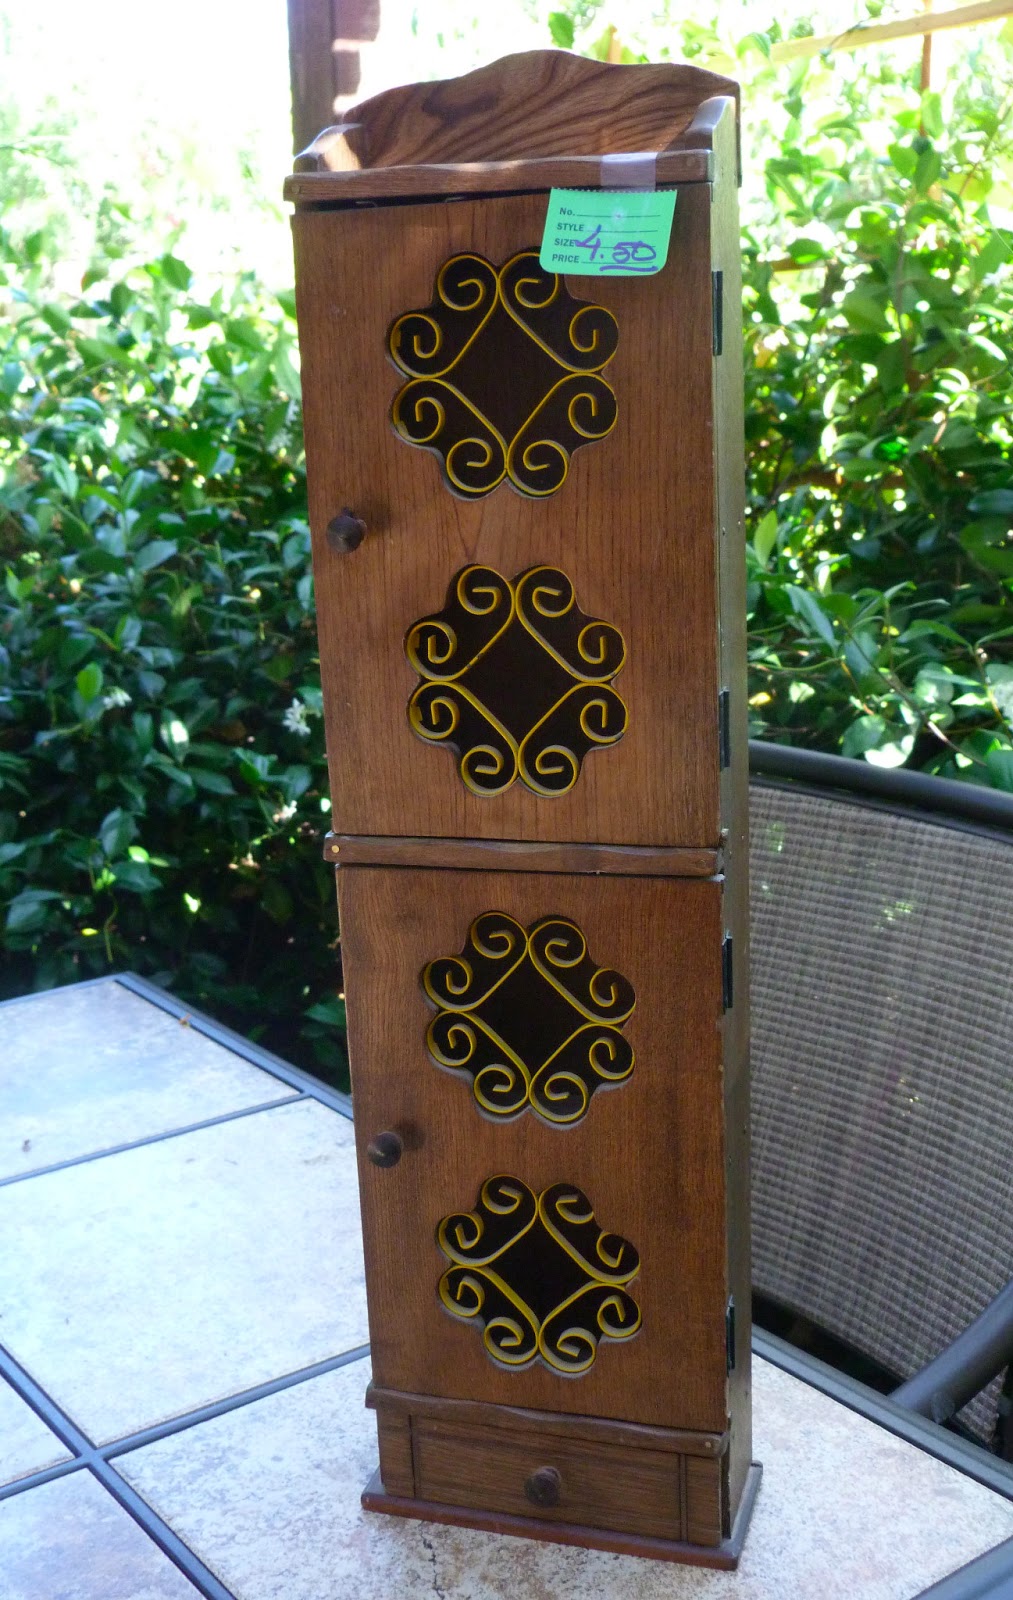
Last month I posted a picture of this spice rack I stumbled across in one of my regular thrift stores for $4.50.


The painting possibilities were endless.  I didn't know where to start.  I felt like I would be overwhelmed by color combinations if I went paint shopping at a retail store.  Instead, I went paint "shopping" in my garage cabinets.  I decided on a dark brown, a creamy white, a turquoise spray paint, and a silver acrylic paint.

The entire spice rack is put together with very small nails, even the metal inserts.  It needed a bit of attention, so I took a small hammer and doctored (tightened) it all up.  I removed the yellow, metal inserts.  They didn't need to be nailed back in because they fit so snug in their place.
I started by painting the inside of the rack the creamy white.  It took 2 coats.  Then, I painted the outside brown, two coats again.  While I was waiting for the rack to dry, I spray painted the inserts.  Finally, I brushed some silver paint on the knobs.

All finished!

I don't know where I am going to hang the rack yet, so I opted to take some pictures of it outside on our patio mantel.


Monday, June 17, 2013

Oh the Possibilities

Look at this awesome spice rack I picked up today at one of my regular thrift stores.  I could not pass this one up.  At only $4.50 it was a must.


The entire thing is put together by tiny nails, which may be an issue for me.


I want to pop these yellow metal figures out and spray paint them, but they are....put in there with tiny nails.  I'll work with them though.
 

I won't use it as a spice rack, but probably instead as something to be hung in our living room or hallway.
 

Stay tuned...

Thursday, June 13, 2013

Thursday Thoughts

Ten Thoughts This Thursday

1.  I wish...we were going to Disneyland this summer.

2.  I want...Maroon 5's new CD.

3.  I think...summertime is more valuable now that I just finished my first time teaching full-time in seven years.

4.  I need...to wash down our kitchen cabinets.  Ugh...

5.  I appreciate...when my chickens are quiet in the mornings because they weren't today and woke me at 5:30am.

6.  I enjoy...watching So You Think You Can Dance (such a GREAT season.)

7.  I struggle...with getting things done unless they are on a "To Do" list.

8.  I feel...fortunate to have such great girl-friends.

9.  I recommend...Clarisonic.  My skin is cleaner and softer since using it.

10.  I hope...my summer break continues to go as slowly as this first week has.

Saturday, June 8, 2013

Distressed Mason Jars

It's day one of my SUMMER vacation and I'm not letting any grass grow under my feet.  I finally had time to craft today! Since going back to work full-time, I just don't have the free hours that I used to have.

My mantel gets a work out, especially starting in the fall and going through St. Patrick's Day.  After St. Patrick's Day there's not much change going on, and I'm okay with that.  However, now that I'm on summer break I wanted to change it up a bit.

I headed over to Pinterest and found this inspiration, which can be found at this website.


While I like the 5 jars and 5 different colors I opted for 3 jars in gradient colors.  Here are the materials I bought at Hobby Lobby.

Silk fern.  The retail price is $22, so I used my coupon on this item.


 Three acrylic paints


Mason jars

I started by painting on one coat.  Side note:  Start painting on the bottom (but not the very bottom) and move to the top.  I started from the top on my first one and it was a bit awkward.  With just one coat, the paint was a bit streaky so I added a second coat and it looked great.  Then, using the advice from the blog post I linked, I used a nail file to do the distressing.  Super easy!


I cut a few sprigs of the fern for each jar.  I had anticipated using more in each jar, but it was too much.


Here they are on the mantel, however my "new" mantel isn't complete.  I'll post pictures of that once it's finished.  I still have to hunt down a few finishing touches.


Monday, May 20, 2013

Busy as a Bee


Yikes...I was afraid to see when my last post was.  March 10th?  Seriously....over 2 months ago?!  

I am working my last few weeks until summer vacation.  My third graders have blossomed all year long and have developed into incoming 4th graders.  So proud.

My personal life is screaming "Tiiiiiime Offfffff" and it can't come soon enough.

Not sure I'll have time for any posts in the next few weeks, but I know what my next project is.

Bunk Beds!


My daughter has recently entered into the world of American Girl Dolls.  This month she received a second doll for her birthday and I thought these bunk beds would be perfect to make for them...with the help of my husband, of course.

Stay tuned!

Sunday, March 10, 2013

Cheerful "spring-y" Wreath

Last spring I made this wreath.


It was all good until the weather got warmer and the afternoon sun beat on the door day after day...and well, the moss faded.

So this year...no moss.

I love the combination of colors of mustard and turquoise.  It was my inspiration for this year's wreath.  After a trip to Hobby Lobby, this is what I came home with:

I go for this type of wreath as opposed to a styrofoam wreath because I think they are more forgiving when wrapping yarn around them. 


When choosing yarn for this type of project I usually go for something with a bit of texture so that it's easier to wrap--like the wreath, it's more forgiving.  This color is "Robin's Egg."  LOVE!


I also picked up some yellow roses, a couple of sprigs of greenery, and some ribbon.


And so, I wrapped and wrapped the yarn.  Then I cut down the flowers and greenery and glued them into place.  Done!


Saturday, March 9, 2013

Shamrock'n Shirt

Next Sunday, St. Patrick's Day, I will be participating in a half marathon run called the Shamrock'n.  I haven't participated in this particular race, but from what I've heard it's a fun run with a great atmosphere....and it's on St. Patrick's Day this year.  Festive!

To join in on the "party" I wanted to dress in something special.  I've been hunting for a green tank top, but haven't been able to find one in the color and style I want.  I was losing hope after shopping at many stores until I went to Target.  Good ol' Target.  I found THIS SHIRT in the perfect green color and for only $8.99!

I got home and immediately got on YouTube looking for a DIY racer back tank top.  I came across this link and followed it pretty much exactly.


After cutting the shirt up I used some multi-colored sparkles to add flair.  To begin, I printed out a shamrock and traced it onto the shirt as a pattern.  Then, I put the shirt over a pillow as a form and  placed a paper plate in between the shirt and pillow so the glue wouldn't get on the pillow.  Using a pair of old tweezers, I dipped each sparkle in fabric glue.


For some more glitz I added some clear sparkles of a few different sizes on the back.

And why stop at a tank top?  I also bought some white wrist bands a dyed them green (since I couldn't find those in green either.)  And to match the shirt, I added some colored sparkles.  Not sure if I'll wear them on my wrists or ankles.