Sunday, July 19, 2015

Refurbished Necklace Holder

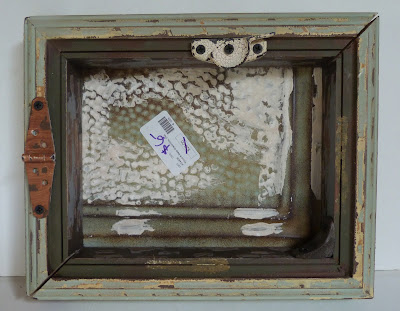
While my daughter and I were out running errands last weekend we stopped by a boutique-home decor store that I try to get to every now and again.  Outside was a table filled with clearance items, including this:


Do you see that price??


It was marked down because two corners had come unglued.


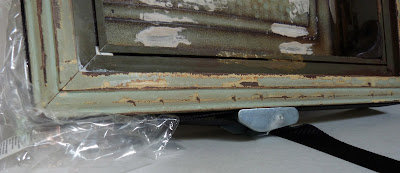
I knew my husband would come up with an idea for gluing it back together.  He added some wood glue, put a baggie around the corners (to avoid getting glue on the wood), and then used a tie-down strap to tighten up everything and hold it in place until the glue dried.


Next came the brainstorming...what was I going to use this thing for?  At first I thought of putting a picture in the middle of the inside, but that seemed sort of....boring.  Then, while putting my jewelry on, an idea came to mind.  I could hang all of my layering necklaces from the top.

Off I went to Hobby Lobby to look for some "hangers."  This is what I decided upon.


As shown in the picture above, I bought a variety pack of glue.  I knew I needed some E6000, but didn't want to buy the large size because it goops up before I use half the bottle.


I played around with both the miniature clothespins and the metal clips.  In the end, I chose the metal clips.  I placed them across the top and once satisfied with how many I was going to use, I glued them on using the E6000.


I have some extra clips that I might end up gluing in the middle area, but I will decide on doing that later, if needed.  While clipping some necklaces on, I realized that for each clip, I can place one chain inside the clip and wrap another one (or more) across the top of each clip.

The finished product.


Friday, June 5, 2015

Living Room Gallery Wall Update

School is officially out and I am on summer vacation.  Today is day one and I wasted no time being productive because hello, it takes teachers a couple of weeks to get into vacation mode.  Unfortunately, I normally don't have the time to devote to my blog like I'd like to.  However, with summer vacation here, and the itch to update some things around the house, I hope to be a bit more active over the next couple of months.

Project #1:  Living room wall.  Back in 2011 we painted our living room and added an accent piece on one of the large walls.  You can find that blog entry and details here.  Things have been tweaked over the years, but the wall was definitely due for an upgrade.  I'm happy with the colors so I didn't repaint.  It was all about new wall accessories.  After cruising Pinterest for a while, I gathered my ideas and headed out to Rod Works, Target, Hobby Lobby, and Home Goods.  

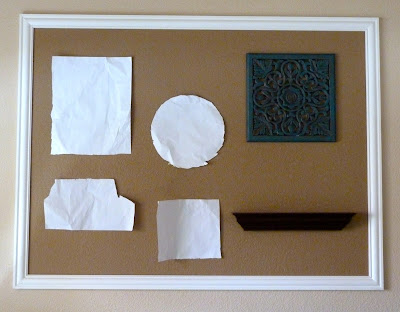
Here is what the wall looked like after I took everything off (I was in such an excited rush that I forgot to take a 'before' picture.)  I used the packing paper from my purchases to cut out the shapes of the items I bought so I could manipulate them until I was happy with the arrangement.


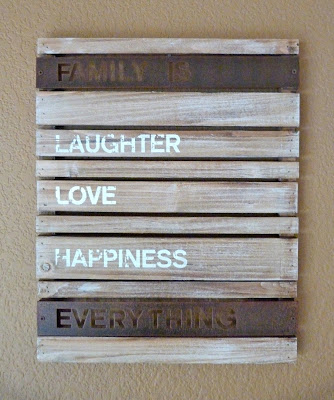
I had initially bought a metal W initial (for our last name) to fit inside an empty frame, but it ended up being too big.  Instead, I fooled around on the Tagxedo website and made this:  A personalized subway art for our family.


At first I was searching for a premade family subway art to print, but then I remembered hearing about this website and gave it a shot.  Totally easy, totally cool.  I typed in the words I wanted to use, chose the shape and colors, and printed it out.

As far as the rest of the wall, here is what I came up with on my shopping trips.

Metal Initial:  Hobby Lobby


 Wall Hanging:  Target

Mirror:  Hobby Lobby


Bike:  Hobby Lobby

 After moving the papers around and around, this is what I came up with.


Oh that...over there on the right side?  I had some handmade project there that I can't find the link to, but it was due to be taken down.  Really, you aren't missing anything.  In its place I found a metal sign from Hobby Lobby and wooden numbers, and the curly rod at Rod Works to hang the numbers from.


Success...my first post in a while.  Stay tuned for more summer projects.!

Sunday, September 21, 2014

Autumn Wreath

I am amazed at two things.  One, my last blog post was in January.  What??  Two, I actually have quiet, leisurely time to put together a quick entry.  I do wish I had more time to do crafty things and post entries on them.  I miss using my creativeness.  

The wreath that's been on my door is the one from my last blog entry.  A white, rose wreath.  


Now that September is almost over I figured it was time to switch it up and get with the season that is just around the corner:  Autumn.

I've had this wreath hiding in the corner next to the piano.  And let's be real...I made it in 2011, which is so yesterday. 


I knew I wasn't going to use it so I figured I could update it.  I cut off all of the felt flowers I had made, which left just the yarn wrapped wreath.  My daughter and I shopped at Hobby Lobby for some new yarn, leaves, and silk flowers.  Here is what we found:


While my daughter and I watched "Flubber" (RIP Robin Williams) I wrapped, and wrapped, and wrapped.  Finally, the creme yarn was completely covered.


The next step was to cut the flowers from the stems, as well as the leaves.  I slowly hot glued some leaves, then a flower, then some more leaves, and more flowers. I started at the base of the wreath in the center and moved out to the right and left until I thought it looked completed.


The finished product...which will probably up until Winter.


Hopefully the it won't be so long before my next entry.  I've got one all ready to go, too.  My daughter has earned quite a few medals this season at her first go around at competitive gymnastics.  She asked if we could make something to hang them from.  The project is finished...now if I can just find more time to post.

Monday, January 20, 2014

Everything's Coming Up Roses

New year, new wreath.  For the last few months I've had an old "fallish" wreath on our front door (found here.)


I was tired of seeing this wreath and wanted something new.  I came across the wreath I made last spring (found here), but it was a bit worn.


I ended up keeping the wreath itself from the picture above and cut off all the yarn.


I picked up some yarn, silk flowers, and ribbon.  Yes, those are some fake dew drops on the roses (more on that later.)


I went with the bouquet of roses, instead of singles because even though the flowers were 50% off, they are still pretty expensive when you get to the better quality flowers.  I bought the bouquet because it was the most bang for my buck.  As far as the cheesy dew drops, I ended up cutting off most of the petals with the "water" on them.

After wrapping, and wrapping, and wrapping the wreath I started hot gluing the roses.  I started in the middle and worked outward with the small roses being placed in between the larger ones.

Within 30 minutes I was done!  


At the time I took the following pictures the sun was shining on the front door, making for some tricky lighting.  Of course I'm too impatient to wait until tomorrow and really, who knows when I'd remember to actually take the pictures when the lighting is just perfect.