Friday, July 29, 2011

State Fair Fun

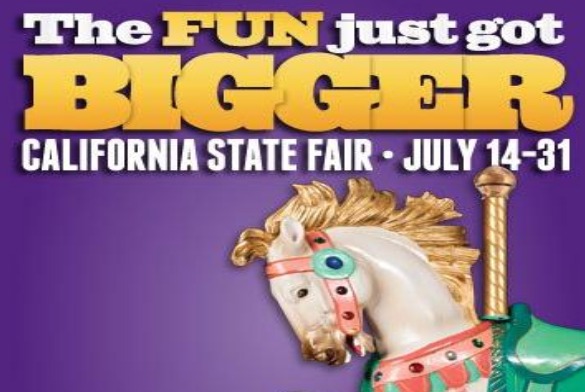
It's Fair Time at Cal Expo in Sacramento, CA again.  This is our 3rd year going as a family...well, come to think of it, this is our 3rd year going ever.  Although Mark and I have lived in the area since 1998 we never attended the fair until 2008.  In the last few years we have learned the ropes of going as a family.  We arrive when the gates open since that's the coolest part of the day and hit up the rides first because there are no lines and again, the weather is coolest--and let me tell you, there is no shade for us parents to be standing in while the kids ride the (overpriced) rides.  While I am on the topic of rides, I am always amazed at the workers who run the rides and the game booths.  What woodwork do they crawl out of to be employed there for 2 and a half weeks and why to 99% of them have missing teeth? 

All right...so from the rides we walk around to look at the outside features and visit all of the animals.  I was very impressed at how clean and well displayed all of the animal stations/corrals were, but we were there when it first opened so that might be why.  This year the kids enjoyed visiting the "farm" where there was a petting zoo (again, super clean), pony rides, and chickens roaming around freely.  Now that we are chicken experts it's always fun to see the different breeds.  Our son fell in love with one of the Silkie (that's the breed) chickens.  Being that they are tame like ours, he immediately picked it up, found a bale of hay to sit on, and held it on his lap..  He was in hea-ven.

In the livestock building we saw sheep being trimmed and shown for prizes.  We also got up close and personal with some longhorn steer.  Whoa...the horns on those fellas were intimidating, especially the older ones.  In addition to the steer, the building was shared with llamas and alpacas.

Here are some pictures that highlight the animal part of the day:

Next, we meandered through the perfectly grown garden, which is something to be envious of, pet the sturgeon, took pictures by the sunflowers, and checked out the orchids in the greenhouse.


We laughed when we saw the "Are you an orchid murderer?" sign and actually took the picture for my dad.  I was given my very first orchid for my birthday from a friend and I am learning along the way about caring for one.  My dad has about 7 beautiful orchids blooming in his house right now and recently he was giving me tips about the flowers, watering, and the soil.

After walking around for a couple of hours, the next item on our yearly agenda is food.  Fair food is something most people drool over and hand over the bucks to enjoy.  Us?  Not so much.  Mark usually gobbles up a turkey leg and the kids and I each devour a big ol' corn dog.  For a treat the kids are happy with an ice cream cone.  We pass on the funnel cakes, deep friend Oreos/Twinkies, and chocolate covered bacon (but I am curious how that tastes.)


Due to time constraints this year, we didn't have time to visit the exhibits in the indoor buildings.  Although our day was cut short, it was a successful visit.  Our son said his favorite part was holding the Silkie chicken and our daughter said her favorite parts were riding the pony and going on the rides.

Thursday, July 28, 2011

Thrift Store Finds: Before and After

Last week I posted some pictures of items I picked up at various thrift shops around town.  Most of the items I had a vision for and have spray painted spruced them up and put them in their place.  If you click on each collage, it will enlarge.

 The flower was painted pink to bring out the accent color in our new curtains.  The bird was painted Heirloom White to fit in with the other birds I have been "tending" to, the lantern was painted red to use for next year's 4th of July decorations, and the candlestick was painted a darker brown to get rid of the orange tint in the original.

 I picked this frame up last week because it was in good shape and I liked the beading detail.  I ended up spray painting it black and using it on the mantel (see picture below.)  The bird print was a free printable found here: http://printable.tipjunkie.com/printable-birds-and-cages/


 The beading shows up better in this picture and see the pop of color behind?  Love it!


  Here is the bird with another bird that we inherited from my grandparents and thought we'd never use.

So here is another before/after project I recently completed.  Years (and I mean years) ago Mark built a frame to hold a piece of scrap mirror we had found.  We hung the mirror above our fireplace as we were trying to fill the walls without breaking the bank.  Slowly over the years the frame began to give way.  As you can see in one of the pictures below, it got a bit wonky.  (Who uses the work, wonky? I dont 'know, but I like it.)  Not to fear...with the help of a couple of L brackets, some wood putty, and the sander, all was fixed.  I painted it the base color of our new curtains and ended up not putting the mirror back in.  And a little confession here:  What happened was that after adding the L brackets and getting rid of the "wonkiness" the mirror no longer properly fit in the frame.  No worries...I had other plans.  Remember the sheet music flowers I made?  I now had a home for them.  In addition to the music flowers, I added a piece of old sheet music from my inherited collection along with a framed saying by Ronald Reagan.  I had the flowers and sheet music hung and realized I needed to fill in the space above the sheet music.  With the help of a thrift store frame I had packed away, black spray paint, some sheet music, and black scrapbook paper I created my own piece of art.

Tuesday, July 26, 2011

Sheet Music Flower

With new curtains in the front room, I have been motivated to do some redecorating.  One of the pieces of furniture (if you consider it furniture) is my piano.  Above the piano is a piece of framed music that my dad hand wrote for me:  A song called "Satin Doll" which I used to sing while he played the piano.  Since I want to tie in a couple more music decor items into the room, I pulled down a box of old piano books and some sheet music that was given to me after my Grammy passed away.  As I thumbed through the music I realized that there were some pieces of music that were a) too hard for me to ever play or b) missing pieces of the composition. 

Perfect!  I would, and I did, create art with the sheet music.

 First, I started by making a pattern (or a "tracer" as I say in the classroom) 


 Next, I traced and cut out 7 pieces from the sheet music


 Then, I created a fold in the middle, at the bottom of the pattern.  I made sure not to fold all the way up so that the top would look like a petal.


 I then folded each side up to the middle fold to create a kind of accordion making sure the middle fold was in the upward direction.


 ...and I taped the sides up to hold the accordion folds together (with a very small piece of tape.)


 Once I had all 7 pieces folded and taped, it was time to start gluing them together.  I used a glue gun and just a bit of glue as to not burn my fingertips.


 Lastly, I added a black button from my collection (all three are different) to each flower to tie it all together.


I have an idea how and where I will hang these 3 sheet music flowers, but I'm not quite ready to make it final. I will post a picture once they are displayed.

Thrifty Finds

I had some time without the kiddos yesterday so I took advantage of being able to shop alone.  I hit up a handful of thrift stores and found some fun pieces.

This flower (I think it's a tea light holder) was 99¢.  My plan is to spray paint it--shocker, right?  Mark and I recently put up some new curtains in our front room (see picture below) and I want to spray paint this flower pink, as an accent color.

The material of our new curtains.  The top of the picture has truer colors.  


 After completing my owls I kinda sorta have a thing for birds.  This lady was $2.99 and I plan to spray paint her with Rustoleum's Heirloom White.


 This frame isn't anything special, but it was new and I liked the beading around the inside of the frame.  It was $3.00 (a bit overpriced for a thrift store.)  Of course it will eventually get painted.


 I immediately pictured this tea light lantern spray painted bright red for our outside mantel.  It'll look perfect with next year's 4th of July decorations.  It was $2.00.

I can never seem to have enough candlesticks.  The one on the left is heavy, made of some sort of metal and was $1.99.  I plan to paint it a very dark brown--I know, it already looks brown, but it's a tad "orangey."  The one on the right was 99¢ and I think once painted will look pretty cool with its design.


Saturday, July 23, 2011

Paso Robles Winecation

Yep, you read the title right.  I created my own word:  Winecation.  Mark and I spent a few days down in Paso Robles while the grandparents had the kids so we could celebrate our 15th wedding anniversary.  The weather was fantastic, warm during the day and cool at night.  For three days we tasted wine, enjoyed the calm surroundings, and devoured tasty meals. 


Some of the wineries we hit up.
Overall, the wine tasting was a fun experience.  However, my only complaint is that some wineries don't waive the tasting fee (generally $10.00) even after you purchase a bottle of their wine.  Oh, and the wine seemed pricey too...$28.00 to $42.00 with most being $36+. We purchased mostly reds because we had a hard time putting down that much money for a white wine.

The highlight of one of the days was our drive up to Calcareous Winery.  It is considered one of the "Far Out" wineries because it's off the beaten path.  The drive up there was beautiful and it gave me a chance to play around with our new camera.
And once we got there....amazing view.  We planned ahead and packed a picnic lunch.  We purchased a glass of wine from the winery and had a very relaxing meal.


Because eventually our taste buds tired of wine, we took a drive down to San Luis Obispo where we strolled downtown, enjoyed a beer (ahhhhh), and got caught in the Thursday Farmer's Market.

Adding a piece of gum to the Gum Wall.

Mark was in heaven with all the meat on the grills up and down the street.

So many flower booths.

Berries, berries, and more berries

Monday, July 18, 2011

Presto Change-o

Just a quick entry on a fast and easy project I took care of yesterday.  Years ago I found this plant holder and have had it out on the deck.

The wet weather has taken a toll on it, but I had an idea to take care of this problem.

Mark cut a 6x6 piece of wood to serve as the bottom.  I added a couple coats of left-over oil bronzed spray paint to the wood and the planter holder.


 Here it is, lookin' brand new.  It'll last a couple more years.

Sunday, July 17, 2011

New Toy

I am so excited about my, I mean our new camera!  We went from this:


To this:

We used to have a fairly decent Canon, but it was dropped and it broke.  I've been using the little FujiFilm camera, which takes mediocre pictures.  The one thing that is very challenging using that camera is taking focused pictures.  I can't tell you how many pictures of the the kids I have that are out of focus.  Frustrating!  We saved up and bought the Panasonic yesterday.  I can't wait to get to know this camera.  There are so many fun features!  Just look at the comparison of the 2 pictures above.  The top one was taken with our new camera and just look at the color and clarity.  The bottom one was taken with the Fuji...it's okay, but the color isn't as great when compared to the top shot.

Saturday, July 16, 2011

Lil' $5.00 Table

One day while I was out thrifting, I came across this table....for 5 buckaroos.  We needed a table for our deck since our half wine barrel table fell apart.  This table wasn't exactly what I had in mind, but for such a reasonable price, I couldn't pass it up.  I liked that the legs of the table had character, but I knew I had to do something about the veneer top.

 The first thing I did was sand the top down.  I wasn't trying to get rid of all of the veneer, but I wanted to sand it down to roughen it up so that spray paint would stick to it.  I used an electric orbital sander.  Once I had it all prepped, I painted it like this to match our then newly painted patio table, which has now been repainted.  Here is what the table looked like after the first paint job.

We left the table like this for a couple of weeks before I decided to spray paint the top...again!  The blue was just...well, too blue, so I went with something more neutral the second time around.

More neutral compared to the blue?  Yes.  Was I happy with the color? No.  As the saying goes, "Third time's a charm."  Oh, and if you look super close at the bottom of the front right leg you can see that the paint started chipping off.  Blast!  I had to repaint the legs too.  What happened was that the legs got wet, the wood expanded and caused the paint to chip.  On to paint job #3, with a color change...again!

First, I had to sand the bottom of all of the legs so that the paint would stick better.

 And here she is.  Ahhhhh, much better!  I went with a dark walnut color for the legs and a colonial red for the top.  I felt that if I painted the entire table brown, it would be too brown, with the color of the chairs and all.  All I have to do now is find some plastic discs to nail into the bottom of the legs.  They will raise the table up off the deck so that it won't get wet as easily. 


And let me remind you how the other side of our deck looks.  It all goes well together now.